What Homeowners Should Check Before Insulating an Older Attic
Author : Attic Insulation Plus | Published On : 28 Oct 2026
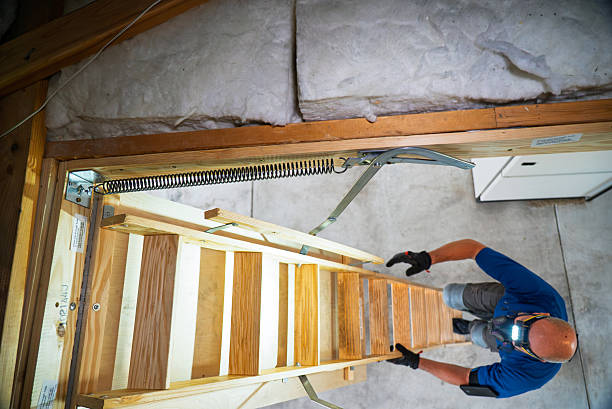
Insulating an older attic is an important step toward improving home comfort, reducing energy waste, and maintaining more consistent indoor temperatures. However, adding new insulation is not always as simple as covering the existing material. Older attics may have damaged insulation, air leaks, moisture problems, pest activity, or outdated ventilation systems that need attention first.
Before starting an insulation project, homeowners should inspect the attic and identify any problems that could affect the results. Taking the time to prepare the space can help prevent future damage, improve insulation performance, and support long-term energy savings.
1. Inspect the Existing Insulation
The first step is to check the condition of the insulation already in the attic. Older insulation may have settled, become compressed, collected dust, or lost some of its effectiveness. In other cases, previous repairs or renovations may have left areas without enough coverage.
Look for uneven insulation levels, exposed sections of the attic floor, damaged materials, and gaps around pipes or other openings. Pay attention to areas where insulation appears wet, dirty, or disturbed.
Adding new insulation over old material may be suitable when the existing insulation is dry, clean, and in reasonable condition. However, damaged or contaminated insulation may need to be removed before new material is installed.
Understanding the Signs of Outdated Home Insulation can help homeowners determine whether their current insulation needs professional attention.
2. Check for Water Damage and Moisture
Moisture is one of the most important problems to address before insulating an older attic. Roof leaks, damaged flashing, plumbing issues, and condensation can allow water to reach the insulation and surrounding wood.
Wet insulation often performs less effectively than dry material. Persistent moisture can also encourage mold growth, damage timber, and contribute to unpleasant indoor odors.
Before installing new insulation, inspect the roof underside, rafters, ceiling joists, and areas around chimneys or plumbing vents. Look for water stains, dark patches, peeling materials, damp insulation, or signs of wood deterioration.
If you find evidence of a leak, identify and repair the source before proceeding. Any suspected mold or extensive moisture damage should be assessed appropriately. Installing fresh insulation without fixing the underlying problem may lead to repeated repairs and additional costs.
3. Look for Air Leaks Around the Attic
Air leaks can reduce the benefits of attic insulation by allowing conditioned indoor air to escape and outdoor air to enter. These gaps commonly occur around ceiling light fixtures, plumbing pipes, electrical wiring, ductwork, attic hatches, and other openings.
Insulation slows heat transfer, but it does not automatically create an airtight barrier. Air sealing should therefore be considered alongside insulation installation.
Inspect the attic floor for visible gaps and openings. Pay special attention to areas where walls meet ceilings and where utility lines pass through the ceiling structure. Properly sealing these openings can help improve comfort and reduce unnecessary heating and cooling demand.
However, use suitable materials and methods for each opening. Electrical fixtures, chimneys, flues, and other heat-producing components may require specific clearances and approved sealing products. Avoid covering ventilation openings or using ordinary foam products where fire-rated materials are required.
4. Examine the Attic Ventilation System
Proper ventilation helps manage heat and moisture in many attic designs. Before installing insulation, check that existing soffit vents, ridge vents, gable vents, or other ventilation openings are not blocked.
Older homes sometimes have insulation pushed into the eaves, restricting airflow. This can contribute to moisture buildup and may affect the condition of the roof structure.
If additional insulation is planned, suitable ventilation baffles may be needed to maintain an open airflow path near the eaves. These help prevent insulation from blocking the intended ventilation route.
It is also important to understand that ventilation requirements depend on the attic design, climate, and building construction. Some roof assemblies use different moisture-control strategies. A qualified insulation professional can assess the existing setup and recommend an appropriate approach rather than assuming that more ventilation is always better.
5. Check for Pests and Contaminated Materials
Older attics can attract rodents, insects, birds, and other pests. Their activity may damage insulation, create unpleasant odors, and introduce droppings or nesting materials.
Look for chewed insulation, droppings, nests, insect activity, and small openings that may provide access to the attic. If pests are present, address the infestation and seal suitable entry points before installing new insulation.
Contaminated insulation may need to be removed, particularly when it contains significant animal waste or other harmful materials. Avoid disturbing potentially hazardous debris without appropriate protection and assessment.
Some older homes may also contain materials that require specialist handling, such as asbestos-containing products. If you suspect hazardous materials, do not cut, pull apart, or remove them yourself. Arrange for qualified assessment before work begins.
Professional Attic Insulation Removal may be appropriate when existing insulation is damaged, contaminated, or unsuitable for reuse. Removing problematic material before installation helps create a cleaner and more suitable space for the new insulation.
6. Review Electrical Wiring and Other Utilities
Before adding insulation, inspect visible electrical wiring, junction boxes, exhaust ducts, plumbing pipes, and other utilities in the attic. Older homes may have outdated wiring, previous DIY repairs, or utility components that require special attention.
Insulation should not be installed in a way that creates unsafe conditions around electrical equipment. Certain recessed lights, transformers, and other heat-producing components may have specific insulation-clearance requirements.
Check whether bathroom or kitchen exhaust ducts discharge outdoors or incorrectly release moist air into the attic. Exhaust air should generally be directed outside through an appropriate duct system, rather than into the attic space.
Do not move electrical wiring, modify junction boxes, or make repairs unless you are qualified to do so. If anything appears damaged, exposed, or unsafe, consult a licensed electrician or the relevant specialist before proceeding.
7. Assess the Attic Hatch and Access Point
The attic access hatch is often overlooked during insulation projects. Even when the main attic floor has adequate insulation, an uninsulated or poorly fitted hatch can allow heat to move between the attic and living space.
Check whether the hatch has insulation, whether its edges fit tightly, and whether weatherstripping is present. A loose-fitting hatch may allow air to pass through the opening.
Suitable improvements can include adding compatible insulation to the hatch, installing weatherstripping, and ensuring the cover closes securely. The solution should preserve safe access and comply with any applicable fire-safety requirements.
Small improvements around the access point can complement the wider insulation project and help reduce unwanted air movement.
8. Choose the Right Insulation for the Home
Once the attic has been inspected and any underlying problems addressed, homeowners can consider the most suitable insulation material. Options may include fiberglass batts, blown-in fiberglass, cellulose, or other products designed for the building's requirements.
The right choice depends on the available space, existing materials, attic layout, moisture conditions, accessibility, and desired thermal performance.
Insulation is commonly evaluated by its R-value, which measures resistance to heat flow. The appropriate target depends on local climate, building codes, and the existing insulation level. Simply choosing the thickest product is not always the best solution if air leaks, ventilation restrictions, or moisture problems remain unresolved.
A professional assessment can help determine whether existing insulation should be retained, supplemented, or removed and replaced.
9. Consider Local Climate and Professional Installation
Homeowners should consider local weather conditions when planning an attic insulation upgrade. Hot summers, seasonal temperature changes, and indoor humidity can all influence insulation and moisture-control requirements.
For homeowners in South Florida, proper installation can be particularly important for managing heat gain and supporting efficient air conditioning. The attic should be assessed as a complete system, including insulation coverage, air leakage, ventilation, and moisture control.
Homeowners seeking local assistance can explore Attic Insulation Lake Worth to learn more about insulation options for homes in the area.
A qualified contractor can inspect the attic, identify problem areas, recommend suitable materials, and install insulation according to applicable requirements. Professional guidance is especially valuable in older properties where previous repairs or hidden issues may complicate the work.
10. Prepare the Attic Before Installation
Before the installation begins, make sure the attic is ready for the work. Address roof leaks, resolve pest problems, arrange any necessary electrical repairs, and remove unsuitable insulation where required.
Confirm that the installation plan accounts for air sealing, ventilation, access points, and safe clearance around heat-producing equipment. Homeowners should also discuss the recommended insulation level, material type, expected coverage, and any preparation or cleanup included in the project.
Avoid storing heavy items on ceiling joists unless the structure is designed to support the additional load. Insulation should not cover areas that must remain accessible for maintenance or inspection.
A properly prepared attic gives the new insulation a better chance of delivering lasting performance.
Conclusion
Insulating an older attic can improve indoor comfort, reduce unwanted heat transfer, and help manage energy use. However, the best results depend on more than adding insulation. Homeowners should first check for moisture, damaged materials, air leaks, blocked ventilation, pest activity, electrical concerns, and poorly sealed attic access points.
Addressing these issues before installation can help protect the home and prevent avoidable problems later. With a careful inspection, suitable insulation materials, and professional installation when needed, homeowners can make a more informed investment in their property's comfort and efficiency.
Frequently Asked Questions
1. Should old attic insulation be removed before adding new insulation?
Not always. If the existing insulation is dry, clean, and in good condition, adding more may be suitable. Wet, contaminated, or damaged insulation may need to be removed first.
2. How can I tell if my attic insulation needs replacing?
Common signs include uneven temperatures, high energy bills, visible gaps, compressed insulation, moisture damage, and pest contamination. A professional inspection can confirm the condition of the material.
3. Is air sealing necessary before attic insulation?
Air sealing is often recommended because it reduces unwanted air movement through gaps and openings. It complements insulation, although the correct sealing methods depend on the location and type of opening.
4. Can attic insulation cause moisture problems?
Insulation itself does not automatically cause moisture problems, but an incorrectly designed or installed attic system can contribute to them. Roof leaks, indoor air leakage, and blocked ventilation should be addressed before installation.
5. Should I hire a professional to insulate an older attic?
Professional help is useful when the attic contains damaged insulation, suspected hazardous materials, moisture problems, complex wiring, or ventilation concerns. An experienced contractor can assess these issues and recommend a suitable solution.
