How to Use Helicoil Threading Taps Correctly: A Step-by-Step Guide
Author : DIC TOOLS | Published On : 24 Aug 2026
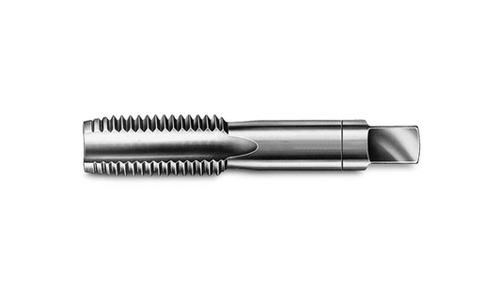
Installing a wire thread insert starts with preparing the correct internal thread. For this purpose, an STI (Screw Thread Insert) tap is used to create the thread profile required for the insert. These taps are commonly used for thread repair and for creating reusable threaded holes.
Using the right tap, drill size, cutting technique, and lubrication can make a significant difference in thread quality and insert installation. This guide explains how to use Helicoil threading taps correctly and the common mistakes to avoid during the process.
What Is a Helicoil Threading Tap?
An STI (Screw Thread Insert) tap is a special tap designed to create the internal thread required for a wire thread insert. Unlike a conventional tap, it produces the thread dimensions needed to accommodate the insert correctly.
These taps are commonly used for repairing damaged threads or preparing holes for reusable wire thread inserts in materials such as aluminum, steel, and other engineering materials.
How to Use a Helicoil Threading Tap
1. Select the Correct Tap
Begin by identifying the required insert size and thread specification. Select the corresponding Helicoil threading tap based on:
-
Thread diameter
-
Thread pitch
-
Metric or Unified thread standard
-
Insert size and length
-
Workpiece material
-
Required thread depth
Always check the tap and insert manufacturer's specifications before starting the operation.
2. Drill the Hole to the Recommended Size
If you are repairing a damaged thread, prepare or enlarge the hole to the recommended STI drill size for the selected insert and tap.
The correct drill diameter is important because it provides the required material for forming the STI thread. Always follow the drill size specified by the insert or tap manufacturer rather than using the original thread's standard drill size.
For a blind hole, also make sure that there is enough depth below the required thread length.
3. Chamfer the Hole Entrance
After drilling, lightly chamfer the entrance of the hole.
A small chamfer helps the tap enter smoothly and reduces the chance of damaging the first thread. It also makes the starting process easier, particularly during hand tapping.
Avoid making the chamfer unnecessarily large because it can reduce the usable threaded area.
4. Align the Tap Properly
Correct alignment is essential for producing a straight and accurate thread.
Place the Helicoil tap perpendicular to the workpiece before starting the cut. If the tap enters the hole at an angle, the finished thread may be misaligned, which can cause problems when installing the insert.
When using a machine, check that the spindle and workpiece are properly aligned before tapping.
5. Apply Suitable Cutting Lubricant
Use a suitable cutting fluid or lubricant based on the workpiece material and tapping method.
Proper lubrication helps reduce friction and heat while improving cutting action and tool life. It can also help produce a cleaner thread surface.
The recommended lubricant may vary depending on whether you are tapping aluminum, steel, stainless steel, or another material.
6. Start Tapping Carefully
Position the tap at the entrance of the hole and begin cutting slowly.
When hand tapping, apply steady pressure and allow the cutting edges to remove material gradually. Periodically reverse the tap slightly to help break chips before continuing forward.
Do not force the tap if resistance suddenly increases. Excessive force can damage the cutting edges or cause the tap to break.
For machine tapping, use the appropriate speed and feed for the tap size, thread pitch, and workpiece material.
7. Control Chips and Tapping Depth
Chip control becomes especially important when working with blind holes.
Control chips during tapping according to the tap design and workpiece material. In blind holes, prevent chips from accumulating at the bottom, as excessive chip buildup can increase cutting resistance and affect thread quality.
Tap only to the required depth. Going deeper than necessary can waste machining time and may create problems in applications where bottom clearance is limited.
8. Remove the Tap and Clean the Hole
Once the required thread depth has been reached, carefully remove the Helicoil tap.
Clean the hole thoroughly to remove chips, cutting fluid, and loose material. A clean hole is essential for proper insert installation.
Inspect the tapped area for damaged threads, burrs, or incomplete cutting before proceeding.
9. Inspect the STI Thread
Before installing the insert, check the finished thread to make sure it meets the required specification.
In production applications, an appropriate STI thread plug gauge can be used to verify the internal thread.
Also check:
-
Thread depth
-
Thread cleanliness
-
Thread alignment
-
Surface condition
-
Presence of burrs or damaged areas
If the thread does not meet the required specification, correct the problem before installing the insert.
10. Install the Helicoil Insert
Once the tapped hole has been inspected and cleaned, install the wire thread insert using the appropriate installation tool. Follow the insert manufacturer's recommended installation depth and procedure. The insert should be seated correctly without excessive force. If the insert design requires tang removal, carry out this step according to the manufacturer's instructions.
Common Mistakes to Avoid
Even a high-quality Helicoil threading tap can produce poor results if the tapping process is not performed correctly.
Using a Standard Tap
A conventional tap should not be used in place of an STI tap. The two taps are designed to create different internal thread profiles.
Using the Wrong Drill Size
An incorrect drill diameter can prevent the STI tap from producing the required thread dimensions. Always follow the recommended drill size for the selected insert and tap.
Starting the Tap at an Angle
Poor alignment can result in a crooked thread and make insert installation difficult. Keep the tap perpendicular to the workpiece.
Applying Too Much Force
If a tap becomes difficult to turn, do not simply apply more force. Check alignment, lubrication, chip accumulation, and hole dimensions first.
Ignoring Chip Removal
Poor chip management can increase cutting resistance and may damage the tap or affect thread quality, especially in blind holes.
Skipping Thread Inspection
Installing an insert without checking the tapped hole can lead to poor seating, incorrect alignment, or fastening problems.
Tips for Better Helicoil Tapping Results
A few simple practices can improve the consistency of the tapping process:
-
Use the correct STI tap for the insert specification.
-
Follow the recommended drill diameter.
-
Keep the tap properly aligned.
-
Use suitable cutting lubricant.
-
Control tapping speed and feed.
-
Manage chips throughout the operation.
-
Avoid excessive tapping force.
-
Clean the hole before installing the insert.
-
Inspect the finished thread before installation.
-
Replace worn or damaged taps when necessary.
Applications of Helicoil Threading Taps
Helicoil threading taps are used in a wide range of machining and maintenance applications. They are particularly useful for repairing damaged threads or preparing holes for wire thread inserts.
Common applications include:
-
Thread repair in aluminum components
-
Automotive components
-
Aerospace components
-
Machine housings
-
Fixtures and tooling
-
Industrial equipment
-
Maintenance and repair applications
They are especially useful in softer materials where a thread insert can provide a more durable and reusable threaded connection.
How the Right STI Tap Improves Thread Quality
Choosing the correct STI tap helps produce the required thread profile for proper insert installation. The right tap, selected according to the thread specification and workpiece material, can also help reduce cutting problems, premature tool wear, and the risk of tap breakage.
Why Choose DIC Tools?
For thread repair and insert preparation, selecting the correct threading tool is essential. DIC Tools provides threading taps and other cutting tools for different machining and manufacturing requirements. Choosing the appropriate tool according to thread specification and application can help achieve consistent machining results.
Selecting the right tool for the application can help improve thread accuracy, machining consistency, and overall tool performance.
Final Thoughts
Using the correct STI tap is essential for producing a suitable thread for wire insert installation. The process involves selecting the correct drill size, maintaining proper alignment, using suitable lubrication, controlling chips, and inspecting the finished thread.
Following these steps can help reduce tapping problems and improve the consistency of thread insert installation in repair and manufacturing applications.
For more details
Contact us https://www.dictoolsindia.com/contact-now.php
